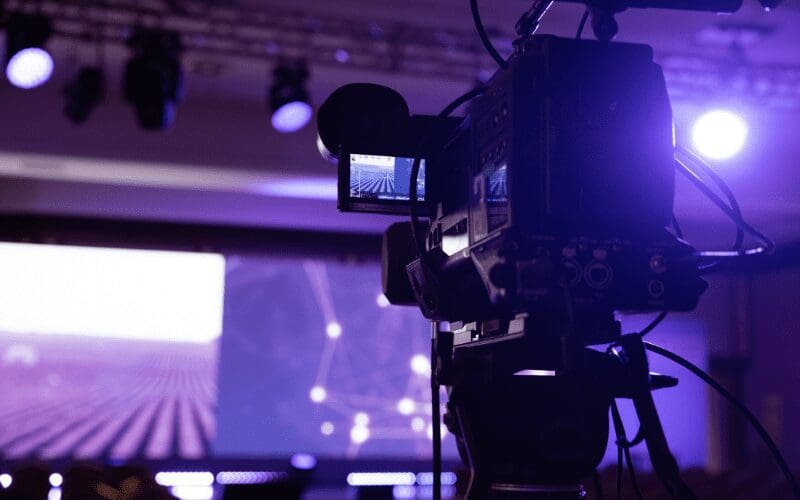
Different types of film transitions are a vital part of the filmmaking process. They are used in pretty much every film, TV show, and video that you watch. Whether you realise it or not! If you’re here then it’s likely that you would like to learn more about film transition. And of course how to apply them to your own projects. Well, the good news is that you have come to the right place!
What Are Film Transitions?
Consider this article your guide to the types of transitions in film, as we will explain the best times to use them and how to use them. We will also outline film editing transitions and recommend some of the best film editing software that you can use.
Film transitions can help take your project to the next level, so, make sure that you keep reading and you’ll have the confidence to apply film transitions to your own work in no time!
A commonly asked question is ‘what is transition in film’? This is a useful question to answer, so let us now define what film transitions are.
They are techniques that are used to combine shots in film. This can be achieved during the filming, or editing process. Film transitions are extremely important in film, as they can help to set the mood or tone of a scene.
In addition to this, they can also help to signify to the audience the passing of a certain amount of time or to separate out parts of the narrative.
Essentially, film transitions positively impact the flow of a video or film, and it’s vital that they are done right, or the message could be misread or confused. Make sure that you stay tuned to learn about the different types of transitions in film!
Film Transitions Types
In this section of the article, we will detail the main types of transitions in film. As well as outline why they are important.
This can help you to consider where they may be useful in your own work.
The Dissolve
The dissolve is a film transition editing technique. It gives the impression of one video clip dissolving into the next one that appears on screen.
The first video clip will gradually become lighter and then the second clip will begin to fade in and eventually come into focus.
Usually, the viewer of the film won’t even realise it’s happening until it’s finished, as it’s a subtle film transition technique.
The quick dissolves convey action and life, and the slower dissolves are used to create an atmosphere of despair.
The Cutaway
A commonly asked question is ‘what is the most basic form of transition’? It has got to be the basic cutaway.
This type of film transition sees the filmmaker moving the scene to another, and then returning back to the scene that they left.
This is a great way of adding some excitement into the film, as well as changing the pace of the clip.
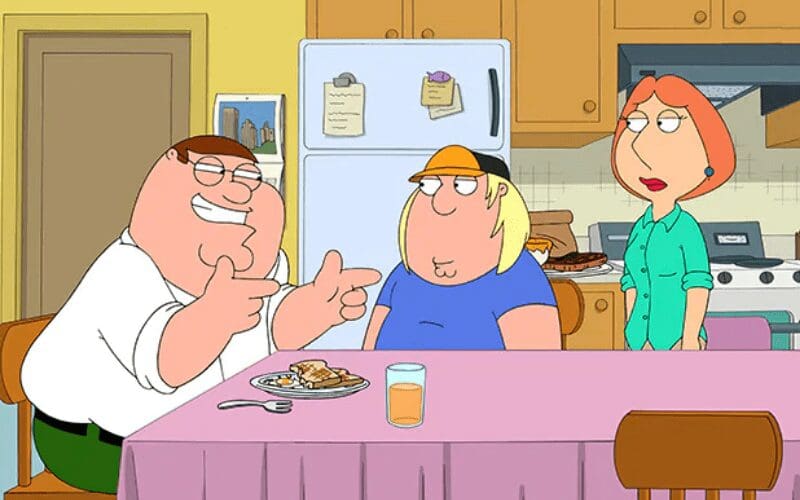
Any Family Guy fans here? If you are, then you will already be very familiar with cutaways – as they are a fantastic way of adding comedy to the show.
The characters in the show even make direct references to the cutaways – especially Peter!
There’s even a whole episode dedicated to cutaways, where Peter and Lois find themselves trapped in a cutaway. It’s called ‘Cutawayland’ and it’s Season 19 Episode 4 – go and check it out!
The Wipe
Think of this film transition as the opposite of what the dissolve does, due to the way that it captures the attention of the audience.
It will be easier here to break up the different transition techniques that the wipe can offer.
There’s the iris wipe (the shape of a circle), matrix wipe (the pattern of shapes), clock wipe (rotating the shape in clock hands), heart wipe (the shape of a heart) and the invisible wipe (the use of walls to cover cut).
The two most commonly used are the natural wipe and the iris wipe.
The natural wipe is pretty self-explanatory, as the aim of the transition is to be as seamless as possible for the audience.
The iris wipe is used to focus on the cemental subject while cropping out the majority of the rest of the frame.
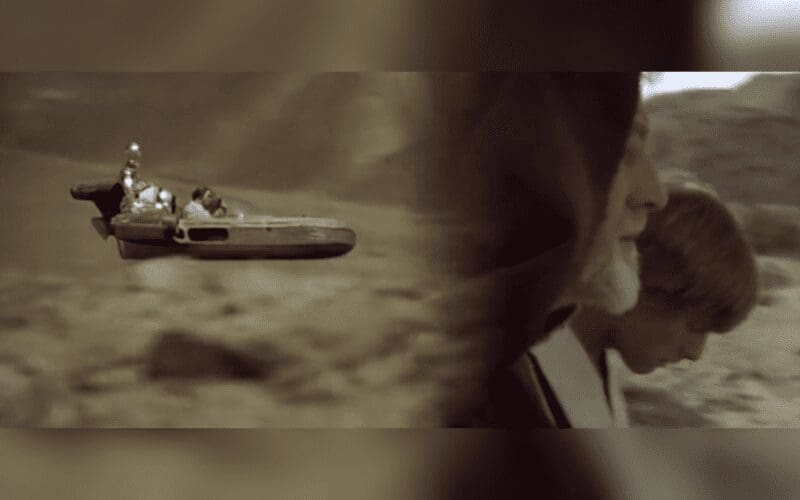
The Star Wars franchise is a great example of the wipe film transition technique – and this is the excuse you’ve been waiting for to go and re-watch the movies!
The Fade

This is one of the most common types of transitions in film. It’s typically used to signify the beginning or ending of a scene.
It’s a popular transition technique for filmmakers who are fading to black or white. You will probably recognise this technique in many opening sequences of your favourite TV shows.
The L Cut & J Cut
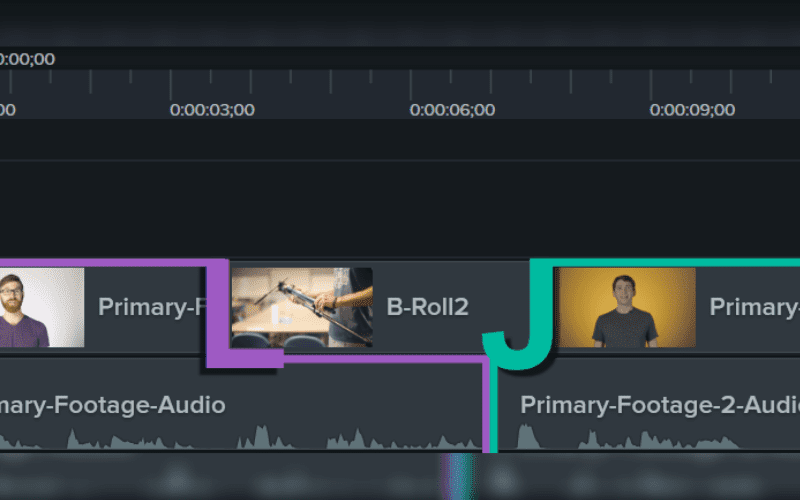
Let’s begin with the L Cut. This type of film transition technique is also known as a split edit, and it’s a film technique that’s been around since the analog filming days.
Put simply, it’s when the sound of the scene of a film transitions over to the next scene (or shot) despite the fact the sound no longer matches the video. These types of edits are great for portraying conversions between characters.
If the camera followed every person when they were speaking it would start to feel unnatural for the audience. Whereas being able to see the reactions on people’s faces as they respond emotionally to what the other person is saying is far more natural (and entertaining) to watch.
So, what’s the J Cut? Well, it’s where the sound of the scene plays before the corresponding shot does. This gives the effect of the visual trailing behind the audio.
Match Cut

When it comes to film editing transitions, you don’t get more creative than the match cut!
This style of cut can add a stylish edge to your scene and it’s a great way for you to get your creative juices flowing. Technically speaking, it’s a standard cut but it stands out from the others thanks to the way it matches the actions of both shots.
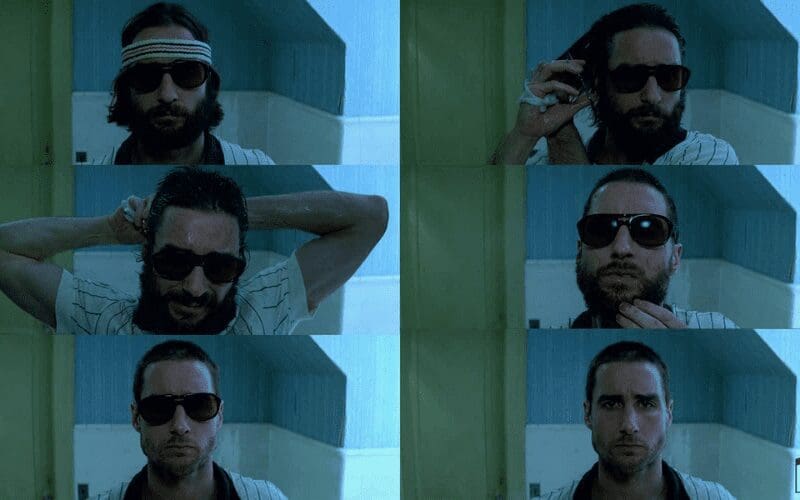
A fantastic example of this film editing transition is from the movie Psycho (1960). During the shower scene you can see the drain and the water swirling down it, before the shot crossfades to a close up shot of Marion Crane’s eye.
Her eye is in the same position (in the frame) as the drain. If you haven’t already, go and watch this movie!
Jump Cut
Now we have the jump cut. This type of film transition is very noticeable to your audience.
To create it you will need a longer film clip and then to cut key elements out of it. Then put the bits you wish to include back into your timeline.
This causes the clip to appear as though it’s jumping through time.
How To Make Film Transitions
Now it’s time to discuss how to actually go about making film transitions for yourself.
There are three main ways to go about making effective film transitions for your projects.
In-Camera
Some cameras can come with built-in transitions and fades. This helps to keep the process super simple for you, as there’s no need to learn any complicated editing techniques.
All you will need to do is complete your set amount of camera moves and placements at the beginning and ends of your shots, then combine the two clips together. Simple!
A good example of this is the whip pan film transition. To complete it you will need to whip your camera to either the right or left at the end of your shot.
When you change to your next location you will need to repeat the process in your next shot. Then all you need to do to complete the transition is to put these clips into an editing software and cut the end of your first shot and the beginning of your second.
This will help to create a seamless transition between the two.
Generating Device
Transitions can also be added into your film in real-time through the use of special effects generators. Take Final Cut Pro X, for example.
You can add predefined clips to your work, such as timecode counters, backgrounds, and placeholder clips. Generator clips can be changed in length and moved much like any other clips you make.
All you need to do is click on the Generator Browser and you will notice the generators are separated into different categories.
Say you wish to add a timecode counter, then all you need to do is click on the Generators button in the toolbar. Then find the timecode generator and drag into the timeline above your primary storyline.
You can place it anywhere you wish, and you can also adjust the length if you need to. You can also adjust the font, colour, and format for it and add a label.
Post-Production
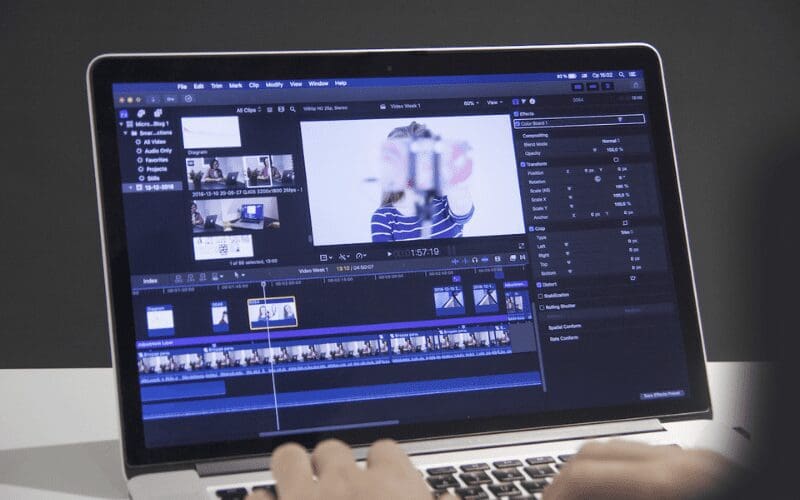
Finally, you can also add film transitions to your project during the editing process. Of course, you will need to use the appropriate film editing software, such as film impact transition.
This is a popular software editing tool for filmmakers. This provides you with some great video transitions for Premiere Pro. There’s a variety of options and effects for you to choose from, and they each have parameter controls which allows for good flexibility.
It’s easy to use, as you simply need to click on the Effects Library section in Adobe Premiere Pro. Then you click on the Film Impact Video transitions underneath the Video Transitions folder. Then simply drag and drop the transitions you wish to use onto your edits. For example, there are ‘motion camera’, ‘stretch wipe impacts’, ‘dissolve impacts’, ‘spin motion impacts’ and plenty more.
You can experience this editing software for yourself for free for 45 days.
This will allow you to try out some of the film transitions for yourself and work out if it’s for you! If you would like to check out what else is out there, then read our helpful articles on The Best Free Video Editing Software and The 8 Best Video Editing Software Programs For 2020. We’re sure you’ll find the best software for you in no time!
Why Are Film Transitions Important?
Film transitions help to create a smooth and seamless flow between two shots or scenes. They help to create a more natural and engaging viewing experience for the audience. By understanding the different types of transitions and when to use them, filmmakers can create a more dynamic and engaging story.
Now You Know All About Film Transitions

So, that was everything that you need to know about film transitions! Effective and successful film transitions are vital in films and videos, as they can completely control and change a scene or shot.
As we have covered some of the main types of transitions in film, why don’t you re-watch some of your favourite movies or TV shows? Think of it as helping your education! While it’s playing you can keep an eye out for all of the types of film transitions and how they help to set the scene.
When it comes to editing cuts and transitions, there are plenty of different types of film editing software out there. Film impact transition is a good option, and you can try it out for yourself for free!
So, what are you waiting for? Put all of your newfound knowledge to the test and take your filming project to the next level! If you want to check out some more film related articles, then head to Мusic Gateway! You can read about Filmmaking Apps, Film Grants, or the Best Camera for Music Videos.