Wondering ‘What does LFO stand for in music’? LFO stands for Low-Frequency Oscillator. That sounds complicated, doesn’t it? So what exactly is an Oscillator? By the end of this article, you will have an understanding of the LFO meaning and how to use it. Before we get into what a Low-Frequency Oscillator does, we need a clear understanding of a couple of terms: Oscillation and Modulation.
LFO Meaning – Oscillation
Oscillation is defined as movement back and forth at a regular speed. To help visualize a waveform, think of the ocean. The waves in the ocean move towards the shore in a rolling motion. They are continuous and at a regular speed. The ocean wave represents a waveform in the audio world, and Oscillation is the movement back and forth of a sound. If you are lying on a raft in a swimming pool and somebody jumps in on one side of you, there will be waves moving towards you, pushing you towards the other side of the pool. If somebody jumps in shortly after the first person on the opposite side of the pool, those waves will send you back towards where you started. This is Oscillation.
In audio, we often view the waveform on a horizontal axis. So, rather than referring to Oscillation as a back and forth movement, we visualize it as an up and down movement.
The Oscillator
An Oscillator in the audio world is a device or component that creates a tone or sound (Waveform). The Oscillator is the originator of the sound or tone. In synthesizers, there is usually at least one Oscillator – and often, more than one. We usually break down the sounds generated into various waveforms. Here are some typical waveforms available:
- Sine wave
- Saw wave
- Triangle wave
- Square wave
The waveform name comes from the shape of the waveform. The SAW wave (pictured below) gets its name because it looks like the jagged edges of a saw.
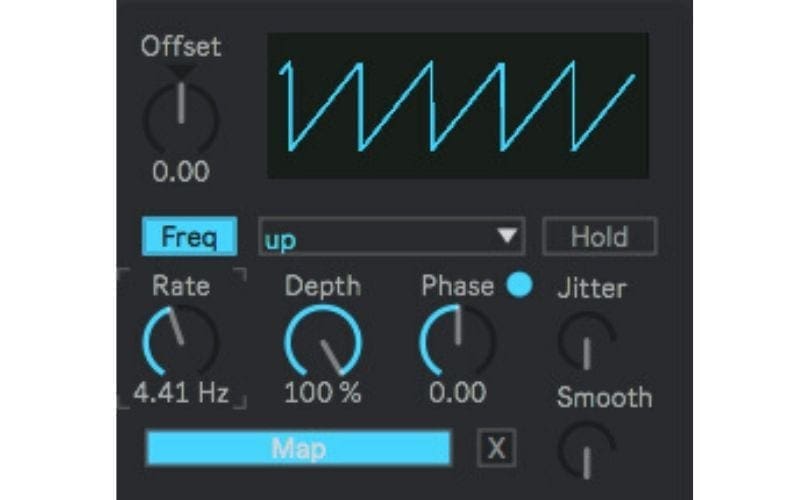
Looking at the image above, we can see that the Saw Wave has orderly and evenly spaced peaks and valleys, which indicates that the sound is happening at a regular interval. If we were to play the Saw Wave (or any of the fundamental waveforms like a Sine Wave, Pulse Wave or Triangle Wave), we would hear a single tone. This is because the peaks and valleys happen so quickly that our ears perceive it as a single sound or tone.
Oscillation In Synths
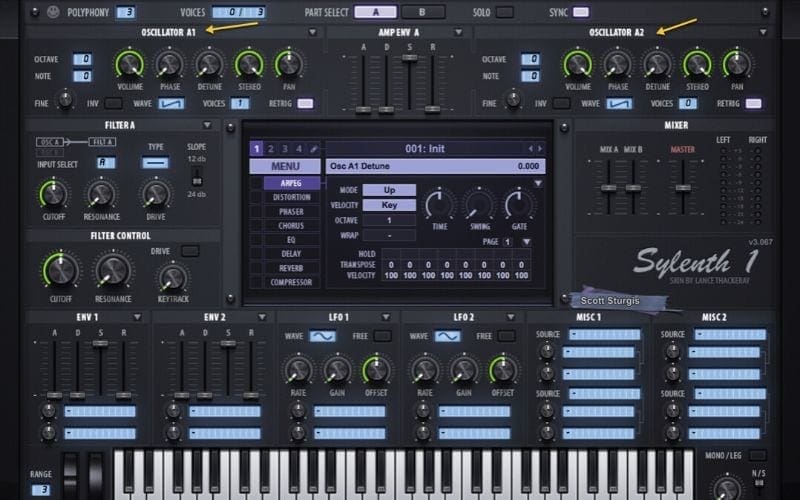
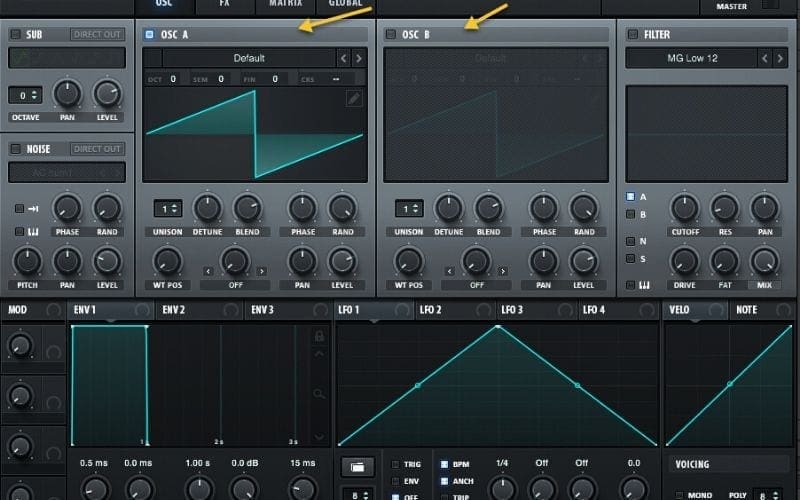
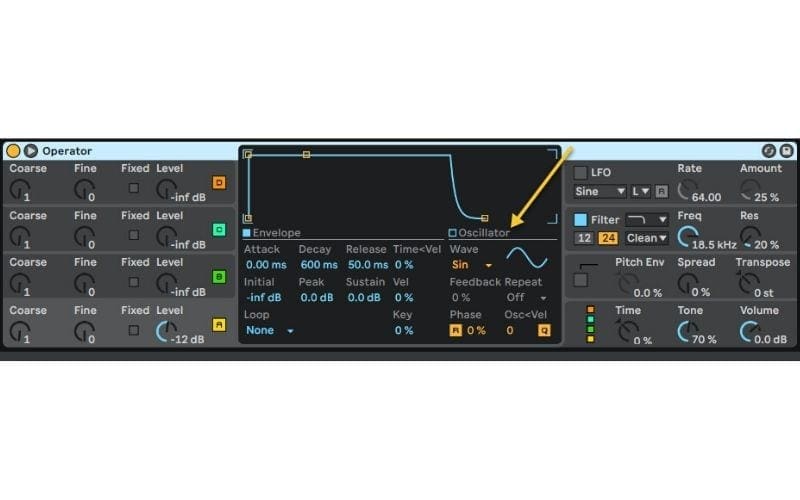
As I mentioned before, many synths have more than one Oscillator. Using multiple Oscillators allows for the creation of complex and interesting sounds, because we are layering multiple sound generators together. Below, I have provided highlighted arrows where the Oscillators are located in some of the popular synths. Can you locate at least one Low-Frequency Oscillator in each as well?
Sylenth1
Serum
Ableton Operator
LFO Meaning – The Functions Of The Oscillator
Oscillators have two main functions:
- As the originator/creator of a sound as in a synth Oscillator
- As a Modulator of an existing sound
Modulators
An audio Modulator is something that changes (or modifies) the original sound or signal. Modulating a sound can add a sense of movement, add or change dimension, and create depth. In general terms, the Pan Knob is a modulator because it modifies the original sound (location). Therefore, so are Saturation, Distortion, Delay (movement and depth), and Reverb (depth).
The type most common types of modulators found in synthesisers are Envelopes and Low-Frequency Oscillators. We will cover Envelopes in another post, and so we will focus on the Low-Frequency Oscillator.
The Low-Frequency Oscillator (LFO Meaning)
The Low-Frequency Oscillator or ‘LFO’ modifies the sound created by the original Oscillation. The synth’s Oscillator creates the original sound or waveform, and the LFO modulates or changes it. Just as the Oscillator uses a waveform to create a sound, the LFO meaning uses a waveform to modify the original sound. The difference is that the Low-Frequency Oscillation waveform isn’t audible. The Low-Frequency Oscillation uses the shape of the waveform assigned to it to create the movement. Changing the type of waveform changes the shape of the movement. Low-Frequency Oscillations can have very simple controls or can be quite complex. We are going to look at some of the standard and most useful components of an LFO.
LFO Meaning – The Parts Of The LFO
The Waveform
As discussed earlier, every Low-Frequency Oscillation has the main and essential component of a waveform selector. Without a waveform, there can be no movement. Waveforms have different shapes, and those shapes affect sound differently based on the shape of the waveform selected. Here are a few of the waveform types available in Sylenth1:
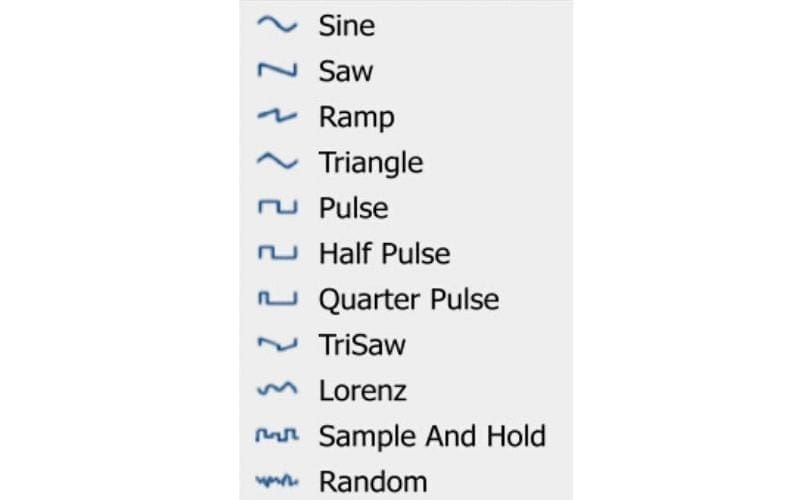
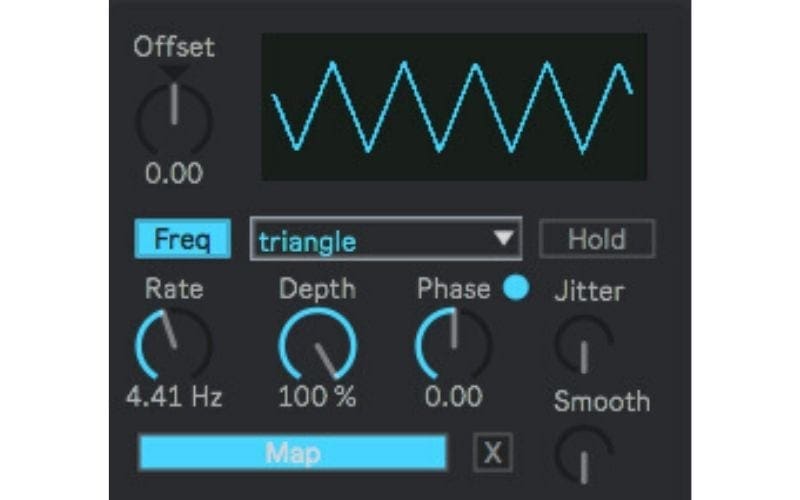
In the image below, the Triangle wave produces a sound that is pointed and then declines in a straight line and back up to the point in a straight line.
However, the Sine wave in the below image produces a sound that is more like the rolling waves in the ocean.
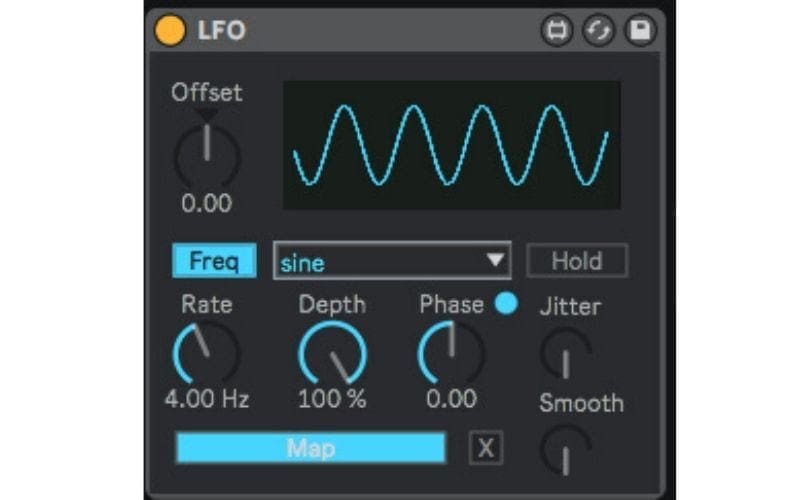
Each waveform has its characteristic shape. Not all LFOS have the same waveforms, but most have the Sine, Saw, Triangle, and Square waveforms available for use.
When modulating the original sound, we want to think about the effect that we are trying to achieve. Do we want that sound to roll and flow (Sine) or increase incrementally to a very definite (and often sharp) peak then decline with the same angle it increased (Triangle)? Maybe we want the sound to be more UP-Down-UP-Down almost like a marching band (Square). The type of waveform selected will determine the type of motion applied to the original sound by the Low-Frequency Oscillation.
The Rate
The Rate knob determines how fast the waveform that you selected is going to move. Is it going to be slow like the rolling motion of the ocean waves? Or is it going to move fast like the motion of a flag blowing in a strong wind? Changing the rate changes the speed at which the waveform moves, but doesn’t change its shape.
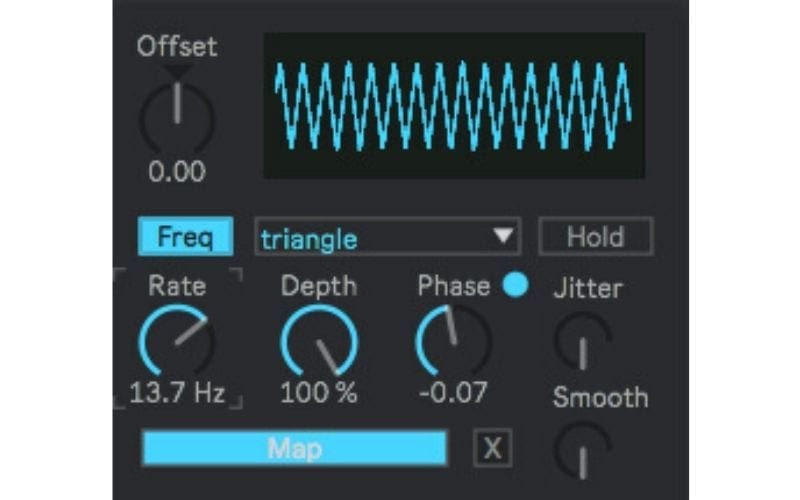
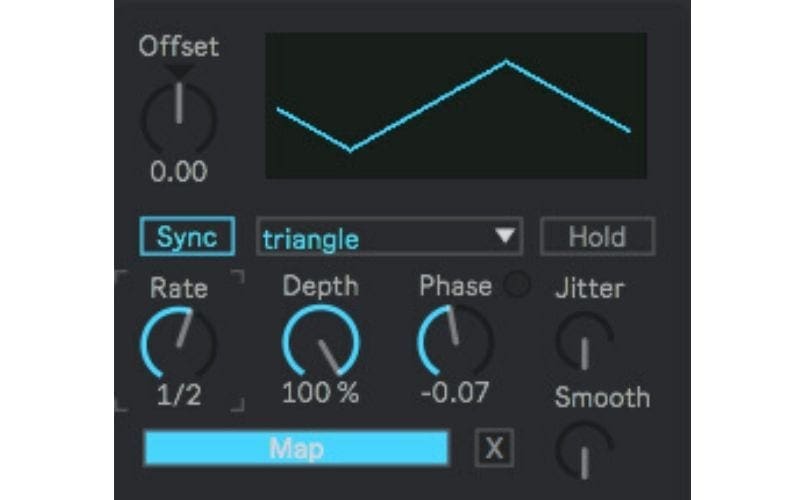
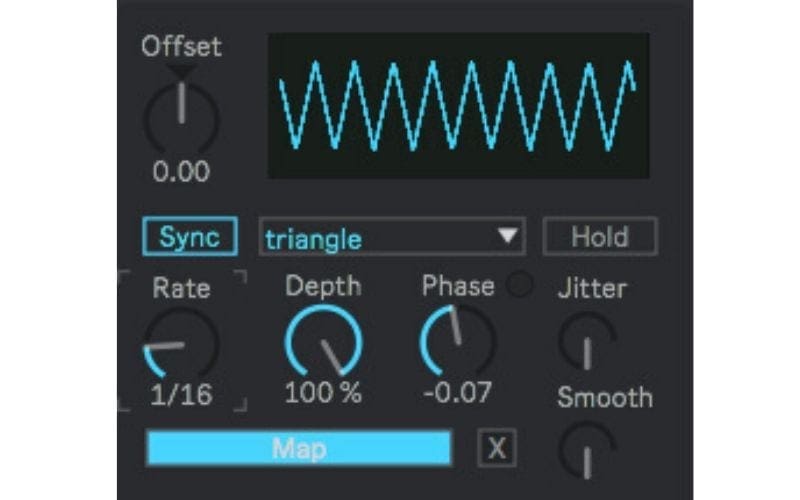
LFO meaning typically, the rate can be adjusted based on a particular frequency along the spectrum (12Hz, 2kHz etc.). This is also known as cycles per second, or by a time value synced to the tempo of the DAW (1/4 note, 1/2 note 1/16 note, 1 Bar, 4 Bars etc). When adjusting the rate based on Frequency, the lower the frequency = the slower the waveform moves, and the higher the frequency = the faster it moves.
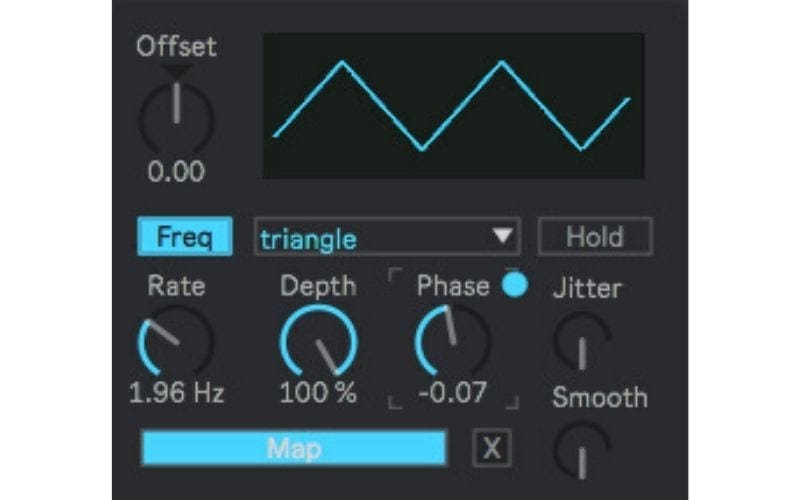
Above is a Triangle Wave with a Rate set at 1.86Hz, and below is the same Triangle Wave with a Rate set at 13.7Hz. The waveform above is moving at a much slower rate than the one below.
The same is true when setting the rate as an expression of time. Below is a Triangle wave set to a 1⁄2 note value.
Below is the Triangle wave set to a 1/16 note value. The smaller the time value, the faster the waveform moves.
Depth
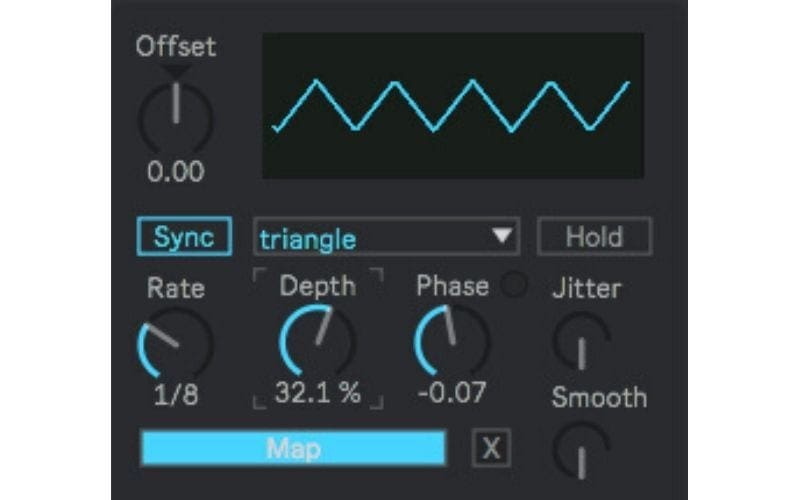
The Depth knob (some synths refer to it as Gain) sets the intensity or strength of the Low-Frequency Oscillation waveform. It determines how much of the LFO meaning waveform will be applied to the original sound. At 100%, you will get a full-strength waveform. As you decrease the depth, the waveform will diminish in size – meaning that its effect on the original sound will be less.
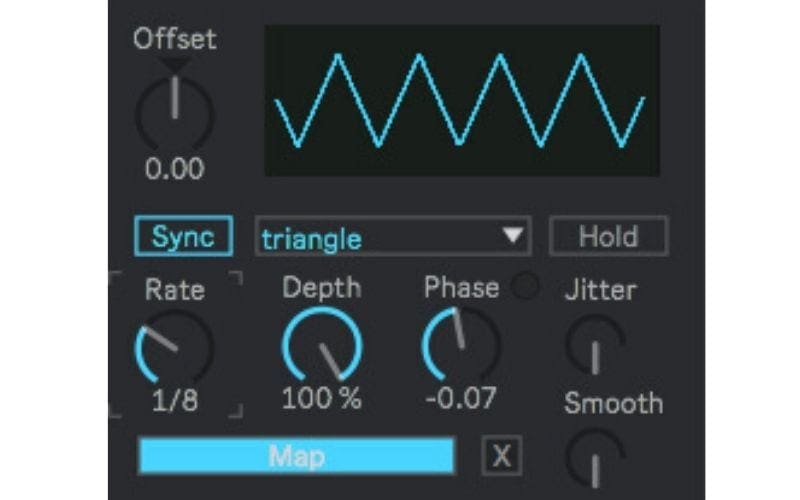
Above is a Triangle waveform with the Depth set at 100%, while below, the same Triangle waveform has its Depth set at 32.1%. You can see how much smaller the waveform is in the image below compared to the image below. The Low-Frequency Oscillation below is going to have less of an effect on the original waveform.
Offset
The offset meaning can be thought of as bending the LFO waveform. It adds or subtracts from the sound passing through it. This functions more like a fine tune parameter that will slightly change the shape of the LFO waveform.
Using The LFO
The steps for using an LFO are:
- Pick the type of LFO waveform (Triangle, Sine, Saw etc) that you want to use to modify the original sound
- Apply a rate to the LFO waveform to determine how fast or slow the LFO waveform will move
- Set the Depth to adjust the gain level or intensity of the LFO waveform
- Use Offset (if needed) to bend the LFO waveform
The LFO is ready to apply to something – but we haven’t told it what parameter we want to apply it to. An LFO typically is applied to a component of the Original sound rather than the entire sound.
LFO Meaning – Applying an LFO
You can apply an LFO to a variety of parameters, meaning you might even apply an LFO to multiple parameters at the same time. Examples of common elements to apply an LFO to include:
- The Volume of the Sound
- The Pitch of the Sound 3
- The Panning Position of the Sound
- Filter Parameters like Cutoff and Resonance
I am going to use LFO1 in the Sylenth1 synthesiser as an example (see the image below).
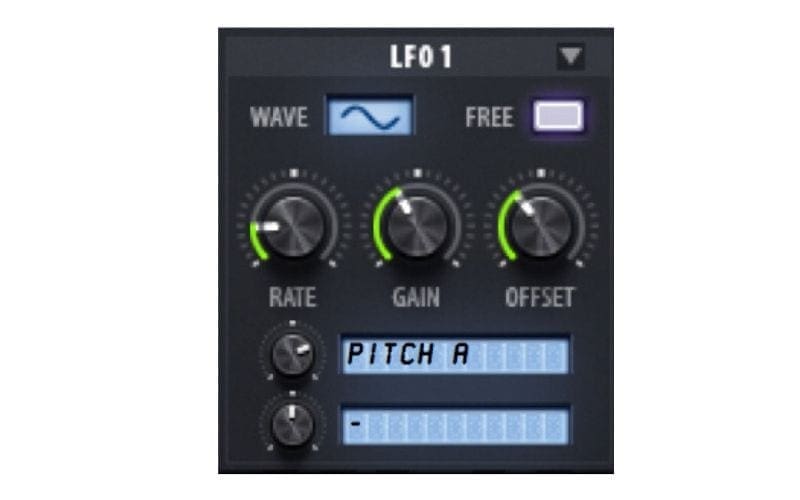
I have set LFO1 to a Sine wave, and adjusted my rate, gain and offset to taste. In the first blue block is “PITCH A”. This indicates that I have assigned LFO1 to modulate (change) the Pitch of the first Oscillator (A). I know I am modifying Oscillator A because of the corresponding letter “A” after Pitch. When I play a note, the sound coming out of Oscillator A is going to have its Pitch altered by LFO 1. Depending on the settings, this could be a very slow, minor movement of pitch or a very fast and more dramatic movement in Pitch.
Another Example
In the next example (see below), I have applied LFO1 on Sylenth1 with the same settings, but this time I am modifying the panning parameter on Oscillator A. When I play a note, the sound coming from Oscillator A will move from left to right (or right to left). Meaning depending on the settings in the LFO, this could be a gradual Pan from the left speaker to the right, or one that is faster and more dramatic, moving side to side rapidly.
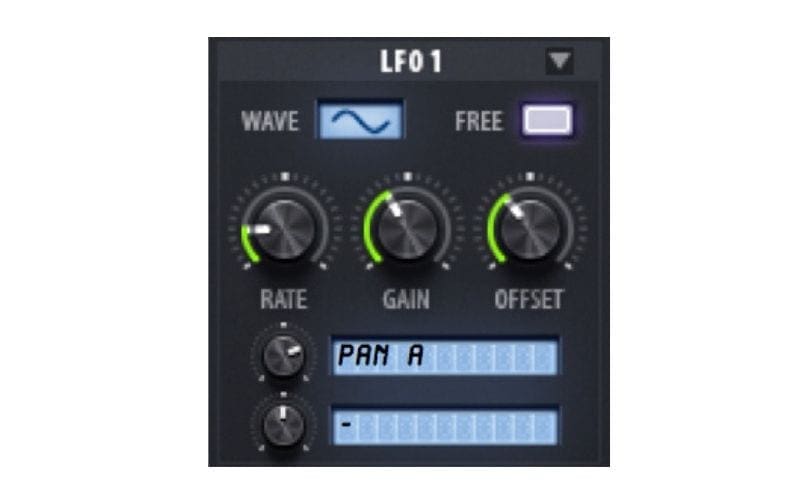
The important thing to note is that we applied the same settings on LFO 1 to two different items: Pitch and Panning. We are only limited by the available parameters in the synth.
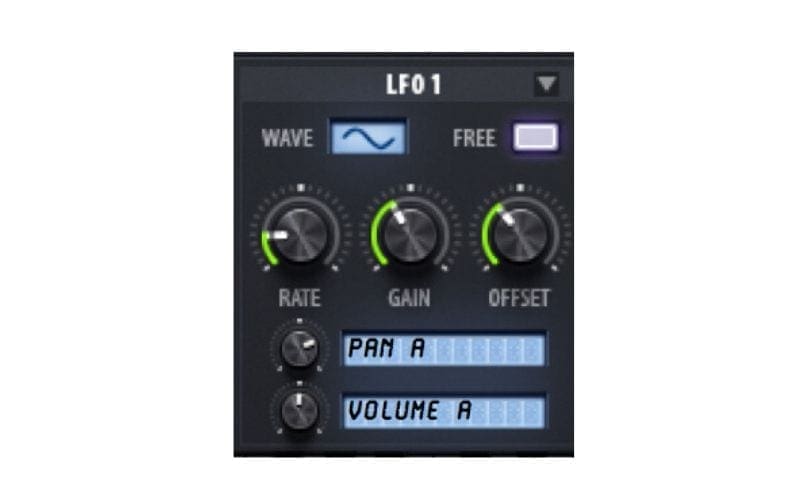
An LFO can be assigned to multiple modulation sources. In the example below, I am applying LFO1 to the Panning AND Volume of Oscillator A. Meaning the same LFO settings will apply to both parameters. You can see how powerful the LFO can be in further shaping a sound!
There are other applications for using an LFO. Some DAWs, like Ableton Live, allow us to use a free-standing LFO plugin to apply to virtually ANY parameter on ANY plugin. The LFO will work exactly the same way that it did in the synth as far as setting basic parameters.
LFO Meaning – Using An LFO Outside Of A Synthesizer
Below is an Ableton Live audio chain with an EQ, Auto Pan, Utility (Gain control), and an LFO:
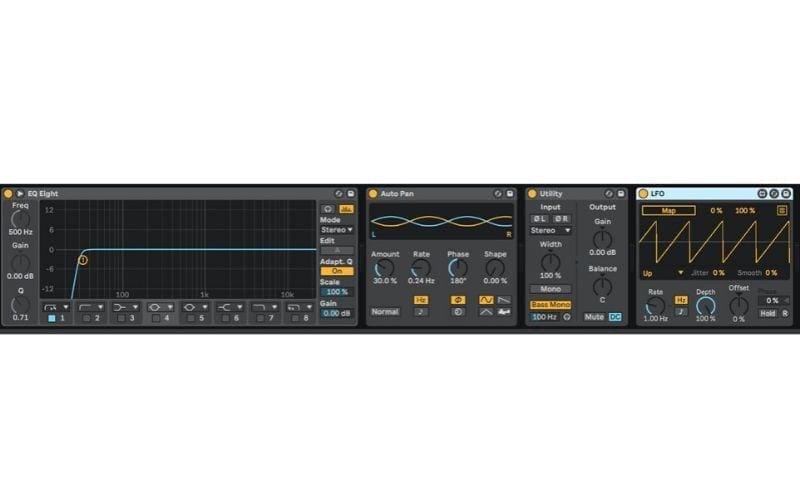
There are multiple options when working with a group of plugins. You can:
- Set each of the plugins separately
- Automate them individually
- Use an LFO to modify multiple parameters with the LFO settings and apply it to one or multiple plugins in the audio chain.
Now, we are going to focus on using an LFO to control multiple parameters on multiple plugins.
Configuring The Independent LFO
The process for configuring a standalone LFO is the same as configuring an LFO inside of a synthesiser:
- Pick the type of LFO waveform (Triangle, Sine, Saw etc.) to modify the original parameter.
- Apply a rate to the LFO waveform to determine how fast or slow the LFO waveform will move
- Set the Depth to adjust the gain level or intensity of the LFO waveform
- Use Offset (if needed) to bend the LFO waveform.
The last step is ‘Mapping’ the LFO to the parameter we want to modify.
Mapping The LFO
Mapping the LFO is the same as assigning the LFO to a parameter in the synthesizer. We have to tell the LFO what item it is going to modify by attaching a link to the parameter. This process is known as ‘Mapping’. Mapping the LFO to a parameter involves three simple steps:
- Click on the MAP button
- Click on the parameter in another plugin that you want to modify.
- Select the MAP button again to turn it off.
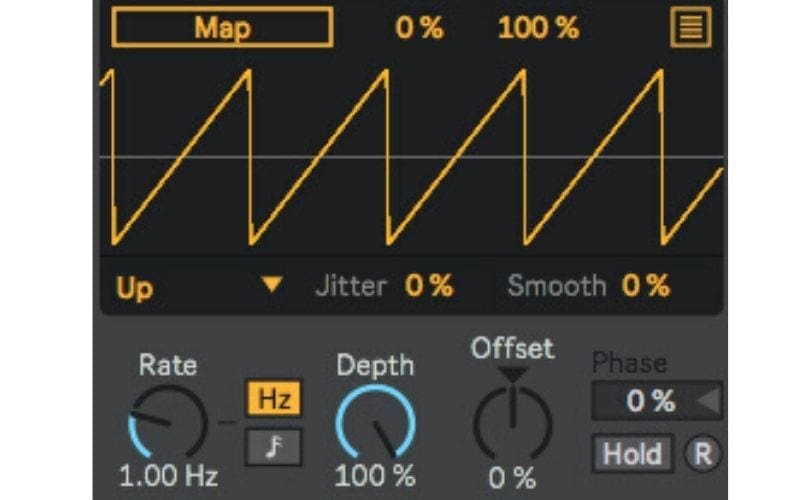
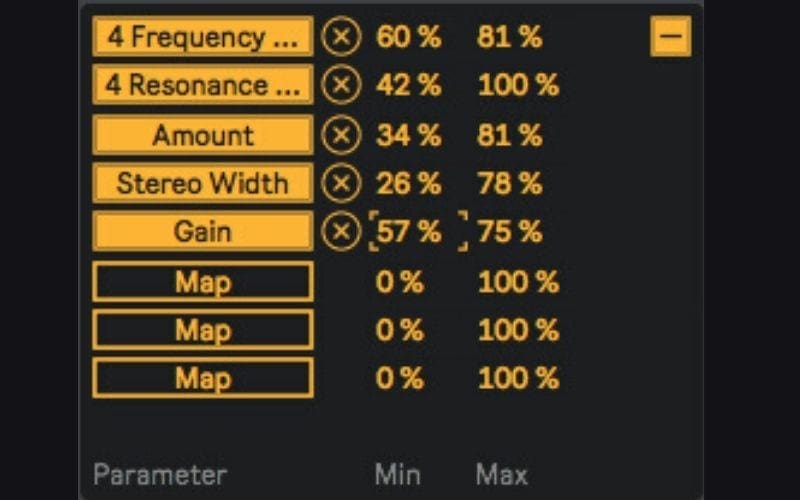
When mapping or linking multiple parameters to the LFO:
- Click on the orange square on the top right of the LFO (see image above)
- Click on MAP in the left column (If a parameter is mapped it will have the name of the parameter instead of “MAP”)
- Go to the plugin parameter you want to link to the LFO and click on it
- Repeat the steps above. When you have finished Mapping parameters click on the Orange “-“ button on the top right to close the window
Here is a YouTube video with more explanations on LFO
Conclusion On LFO Meaning
The LFO is a very powerful tool for modifying and manipulating sound both inside a synthesizer and as a standalone tool on a track. Give it a try in your next song, it can make all the difference and elevate your music even further!
Now you have learned all about LFO and how to apply it, you will hopefully be utilizing your new skills! Allow us to help you amplify your music, collaborate with others, and even get your music in TV, film, and more. Why not try Мusic Gateway for free?


