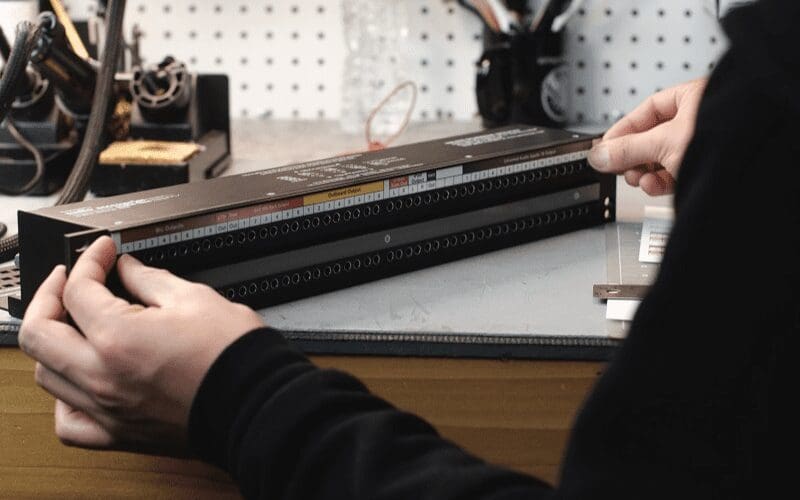
If you’ve ever spent any time in a professional recording studio, you have probably seen a patch bay. Even if you’re not entirely sure what it does or how it works! In this article, we’ll provide answers to the questions: what is a patchbay? And what is a patchbay used for? We’ll also go into how to use a patchbay.
Be sure to stick around until the very end so you don’t miss out on any key information!
What Is A Patch Bay?
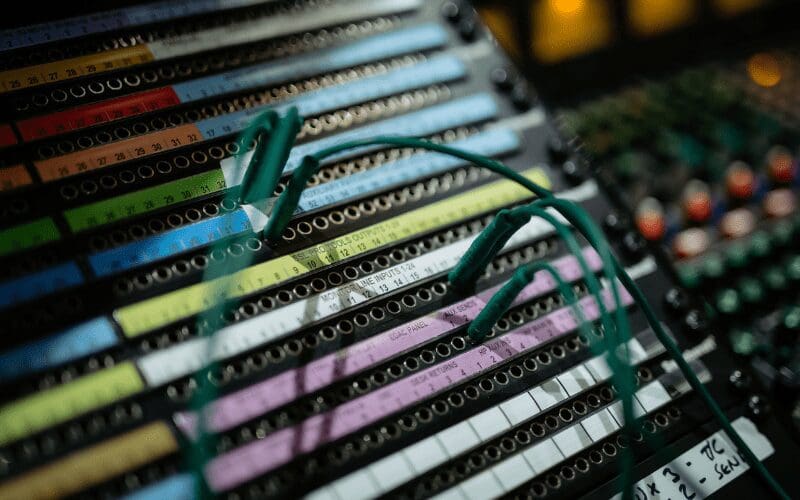
The patch bay is actually one of the oldest technologies you’ll find in a recording studio. It goes all the way back to the old days of switchboard operators connecting different lines and routing phone calls.
Just like the switchboard operators of the early to mid 20th century. The main concept behind a recording studio is connecting different bits of outboard equipment together in a simple and easy way.
What Is A Patchbay Used For?
Patchbays have a variety of different uses which we’ll delve into in more detail further into this article. But, in a nutshell, patchbays are used as a way of easily routing instruments and outboard effects in a studio environment.
This is in order to make the recording process smoother and more efficient.
Since you don’t need to connect lots of different pieces of equipment every time you want to record something.
Should You Use A Patchbay?
Patchbays are great if you have multiple instruments in your studio and limited inputs on your interface.
For example, if you have 10 different synths or keyboards in your studio but you are recording with a Focusrite Scarlett 2i2 which only has 2 inputs. A patchbay means you can have all of your instruments plugged in and ready to record.
Use the patch bay to easily route them into one of the 2 inputs for recording. All this without needing to run cables all over the place.
Patchbays are also great if you use lots of outboard effects like compressors or modulation units, etc. You can easily route your signal into different effects. You can do this without the need to re-wire for every single thing you want to do.
Of course, you only need a patch bay if you are working with multiple instruments you want permanently wired up for recording. Or if you’re using outboard equipment for recording.
If you are using things like pre-amps, compressors, outboard effects (such as reverb or tape echo) or any other physical effects unit that your input (your line from an instrument or microphone) goes through before it goes into your recording device.
Generally speaking, this will be the DAW – Digital Audio Workstation – of a computer. But it could also be hard disk recorders or even tape recording consoles, etc.).
If you are recording “in the box” – i.e. only using the software plugins within a DAW – then a patch bay is not going to be a useful piece of equipment.
Types Of Patchbay
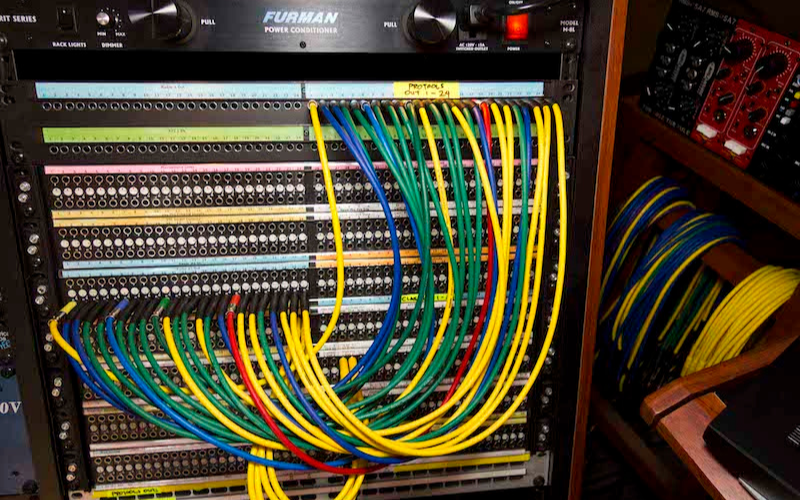
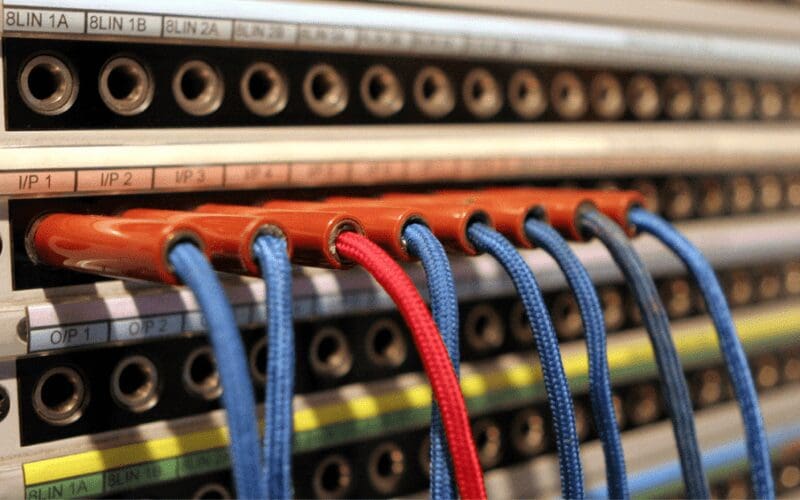
There are a few different types of patchbay – TT (‘tiny telephone’, also known as Bantam), 3/4″ and even XLR are quite common. The TT patchbays are useful because they take up very little space and it’s easy to route with them.
Some engineers prefer the 3/4” jack patch bays because they have bigger, more robust cables.
Some patch bays on the market have multiple different connections. Of course, the more you spend on a patch bay, the more options you have for different connections.
It is even possible to get a MIDI patch bay. These are much less common but operate on the same principle. They allow you to route different MIDI signals to physical inputs in a recording interface or through outboard effects, etc.
How To Use A Patchbay
The best way to explain what an audio patch bay is used for is to give a hypothetical example:
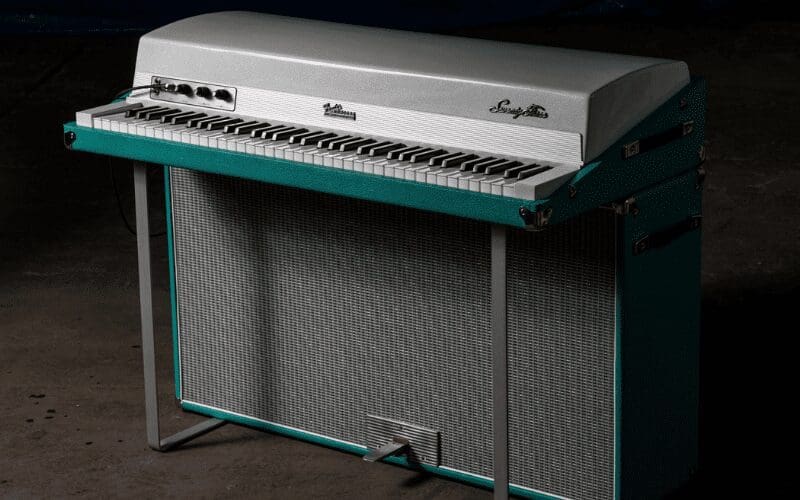
Let’s assume we are recording a Fender Rhodes (it could be any sound source).
The signal from the Fender Rhodes comes out of the jack socket on the left. Let’s also assume that we want to run the Fender Rhodes into a compressor.
Before the signal finally goes into the recording interface and into the computer DAW for recording.
The simple way to do this would be to simply go from the Rhodes into the preamp, out of the preamp into the compressor, out of the compressor into the recording interface.
But what if you wanted to add a reverb unit into the chain? Or what if you wanted to just go through the preamp but not through the compressor? Or what if I wanted to use a different instrument but go through the same chain?
This would mean you would need to get behind your rack unit or mixing desk every time you want to try a different configuration and re-wire everything.
Enter the Patchbay!
Incorporate An Effects Unit
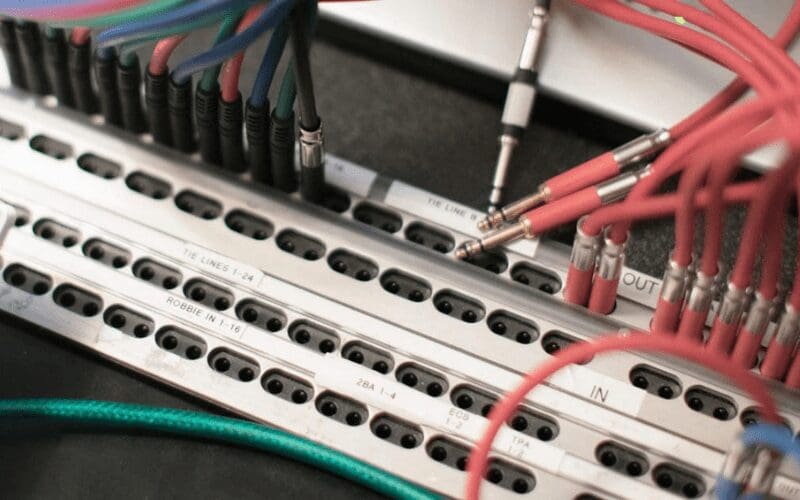
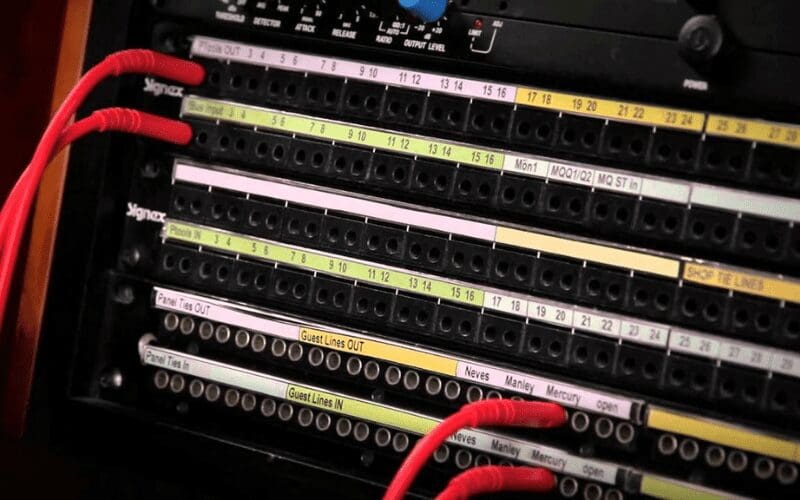
Whilst it looks scary and confusing, patch bay audio routing is a fairly simple concept. Taking the front view, your outputs are generally the top row and your inputs are along the bottom.
Then on the back, you have another two rows of sockets.
Now, continuing our hypothetical case. Our Fender Rhodes signal goes into the top-back input on Channel 1 of the patch bay. We then take a cable from the bottom-back of channel 1 that goes into the Channel 1 input of our recording interface and computer DAW.
The recording interface will automatically receive the signal from the Fender Rhodes via the patch bay. This process where a line into the top–back is automatically routed to the bottom-back output is called Normal.
Normal is just another word for automatic. It means that without any additional settings, the patchbay will automatically send what goes into the top-back to the bottom-back, unless the chain is broken.
Let’s assume we want to run the Rhodes through a compressor. We can insert one of our patch cables into the Top-Front effectively breaking the Normalisation chain.
The signal from the Rhodes then goes into the input of the compressor and the output from the compressor goes into the Bottom-Front and back to the DAW like so.
Route An Instrument Into A Specific Recording Interface Channel
So, let’s look at another example use case. Let’s say you wanted to record a Bass Guitar and go into Channel 1 on your DAW. Currently a Rhodes is routed to channel 1 on your DAW via the patch bay.
The great thing about a patch bay is that you don’t need to now unplug the Rhodes or re-route anything. You can simply plug the bass directly into the Bottom-Front input on the patch bay.
Breaking the Normal chain from the Rhodes to Channel 1 of the Recording interface/DAW and send the bass guitar there:
So, patchbays allow us to easily route signal flows without needing to go around the back of our recording equipment. There’s no need to plug in and unplug multiple cables.
So if you have a range of instruments in your studio and only limited inputs on your recording interface, a Patchbay can be a great way of easily switching instruments around and recording them.
Incorporating Multiple Effects
Things get really interesting when you start using multiple channels on a patch bay to manage what outboard effects you want to use. For example:
If we continue with our hypothetical situation and assume that our Fender Rhodes is plugged into the Channel 1 Top-Rear of the patch bay and the Channel 1 bottom-rear of the patchbay leads to Channel 1 input on our recording interface for our DAW.
Let’s also assume that on Channel 2 of our patchbay has the bottom-rear connected to the input of a compressor and the output from the compressor connected to the top rear. Let’s also do the same thing with a reverb unit.
Now, if you insert a patch cable into the top-front of Channel 1 on the patchbay, you have the Fender Rhodes signal.
You can then use that cable and plug it into the bottom-front of Channel 2 – this sends the Fender Rhodes signal into the compressor.
Then if you take a cable and plug it into the top-front of Channel 2, you have the signal coming out of the compressor. You can plug that into the bottom-front of channel 3. So now our Fender Rhodes has gone through the compressor and into the reverb unit.
You can then take a cable and run it from the top-front of Channel 3 into the Bottom-Front of Channel 1 which goes into Channel 1 of our DAW.
So you can see that in the example above we can easily add or remove the compressor and/or reverb unit from the signal chain before it goes into the DAW to be recorded.
‘Normal’ Vs ‘Half-Normal’ Mode
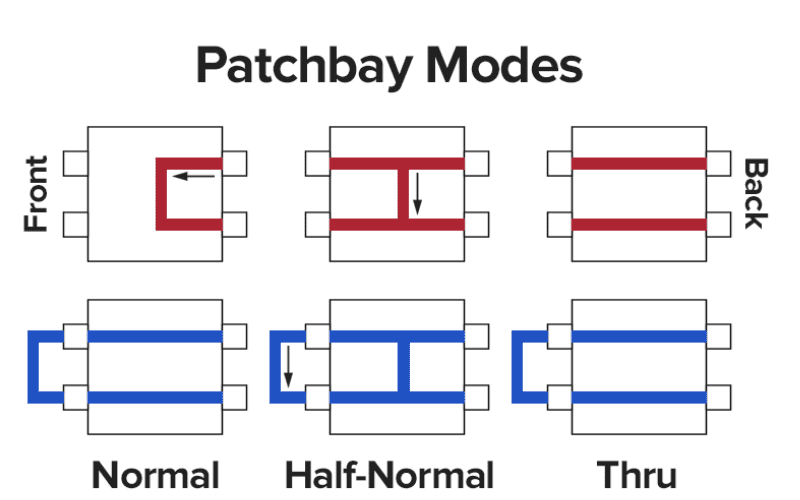
There is also one final great thing about Patchbay usage! We spoke above about how Patchbays configured as ‘Normal’ have an automatic routing. Where the top automatically routes to the bottom of a channel if the chain remains unbroken like so:
Plugging a jack into the Top-Front of a channel breaks this automatic routing so you can send the signal to other effects units, etc.
However, patchbays can often also be configured to be ‘Half-Normal’ this means that if you plug a jack into top-front of a channel, the automatic routing chain is not broken but rather the signal is split as below:
This is useful because you can route another channel on your patchbay to input 2 of your recording interface for your DAW. Then you can record both the dry, unaffected signal from your instrument (in this case the Rhodes) AND the wet, affected signal and blend the two if you want to.
5 Of The Best Patchbays
Here, we will take a look at 5 of the best patchbays on the market.
Let’s dive in!
Behringer Ultra Patch Pro
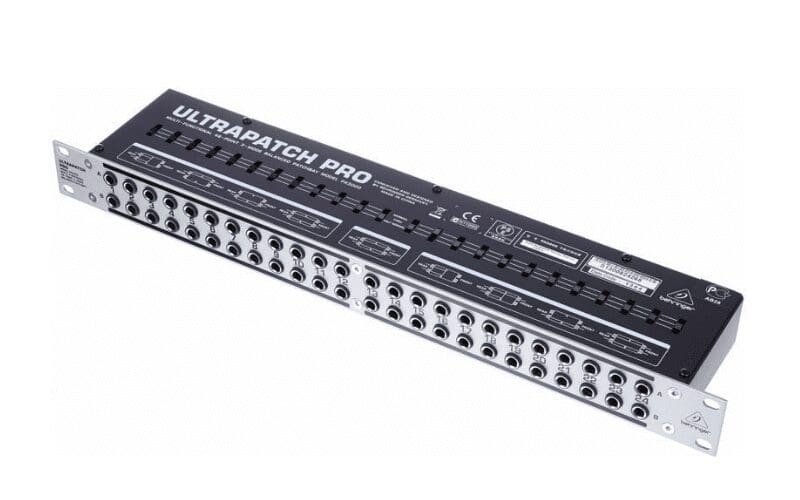
The Behringer Ultra Patch is a great low-cost option at £55. It is a 48 channel patchbay with Three switchable modes per channel (Normal, Half Normal and THRU connected).
This is particularly useful as it doesn’t require any soldiering like some of the more customisable patchbays do. And from a size point of view it only takes up one rack unit.
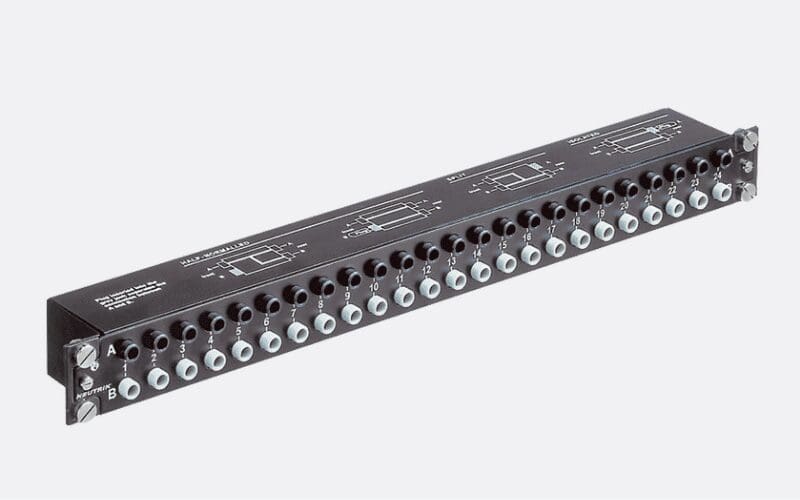
Neutrik NPPA-TT-SD25
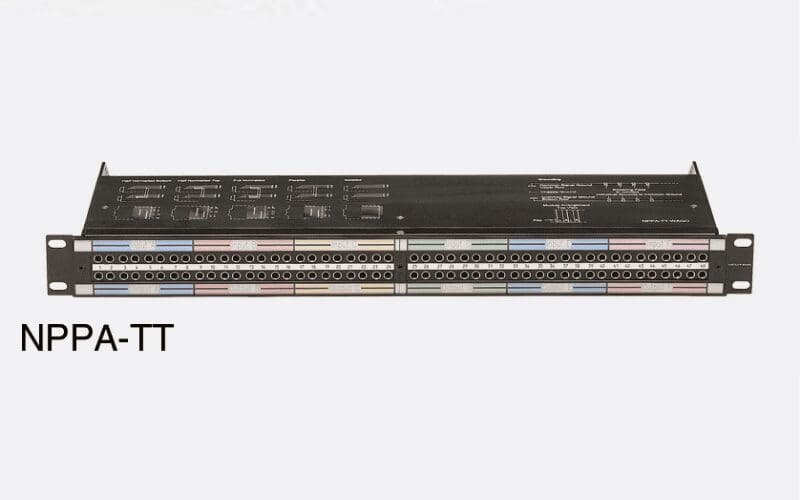
The Neutrik is at the opposite end of the cost spectrum coming in at £845. The front uses TT connections whilst the back actually uses 12 x 25 Pin D-Sub connections.
This means you can connect multiple XLRs into a single D-Sub connection so it’s useful if you have a large amount of outboard gear that you are connecting.
Millenium PB16 XLR
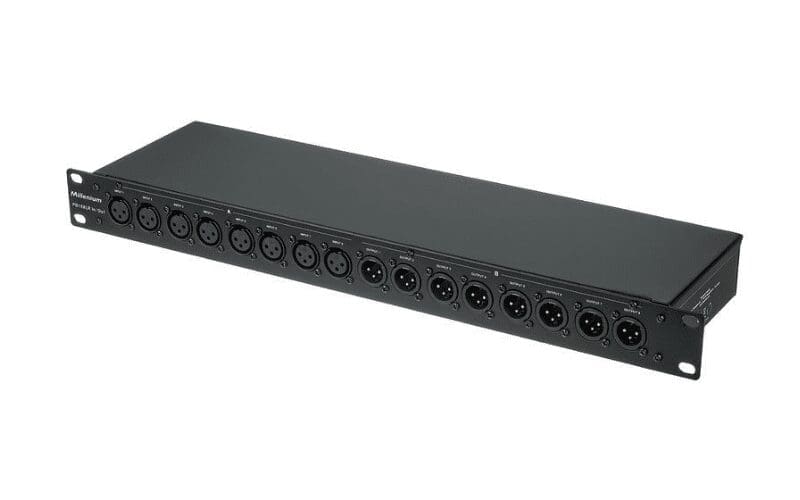
The Millenium PB16 XLR is a very simple bit of kit – rather than a normalled patchbay routing concept as we’ve outlined above, it’s a simple 16 channel 1-in-1-out patch bay.
This is great if you have an 8 track rack interface where some of the inputs are on the back as it allows you to have your inputs on the front and plug your mics straight in.
It does offer less functionality from a routing perspective so whether this is a helpful bit of equipment is really down to how you work in your studio.
Neutrik NYS-SPP-L1
The Neutrik is pretty reliable and fully customisable in terms of if you want to have normalled or half-normalled routing on any or all of the channels.
It does, however, require that you take off the front of the patchbay and flip the internal cards around so it’s a little bit of a job but not too taxing.
ART P48
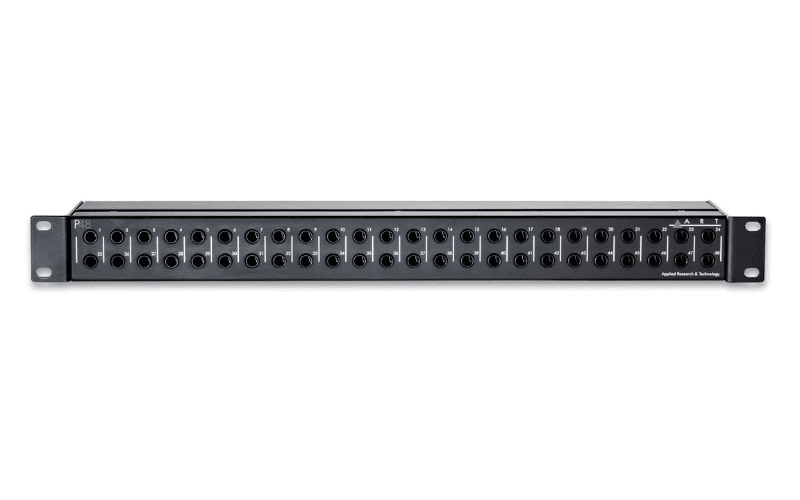
The ART 48, as the name suggests, has 48 inputs on the front and back. The key thing is that the inputs are balanced which reduces noise. Like the Behringer and the Neutrik, the channels can all be customised to be half or full normal.
But what’s nice is that the switches to change the channels are on the back of the unit so they are much easier to access than on the Behringer. They are definitely easier than taking the rack apart like you do on the Neutrik.
This means that the patch bay is much more flexible and doesn’t need to be removed from the rack every time you want to change your studio configuration.
Now You Know Everything You Need To Know About Patchbays
Whilst it is a lot to wrap your head around, both the artistic, creative side of the brain and the inner gear nerd are excited by what patchbays have to offer.
They open up a whole host of really interesting options when it comes to having all of your instruments primed and ready to record. Also when it comes to looping different effects for any sound you’re working with.
Perhaps the easiest way to learn how to get the most out of a patchbay is to buy a cheap one and start using it – half of the fun is in the experimentation! Good luck, and enjoy!
What’s your experience with patchbays? Let us know in the comment section below! If you found this article useful, why not share it on your socials? Be sure to tag us @musicgateway!
If you enjoyed this article, why not check out another on our blog? Here are articles on How To Build A Home Studio, Audio Cables Guide and Audio Signal Guide to get you started.
Are You A Musician Or Artist?
Do you want to learn more about music gear and further your education? Then check out the Academy. Our courses are designed to give you skills that are valuable to you as an artist. Whether you’re looking to learn a new instrument, understand how to use a specific DAW or want to get better at songwriting, we’ve got a course for you!
By joining Мusic Gateway, you can also collaborate globally with other musicians, songwriters producers and more. Finally, amplify your music to those that need to hear it with music promotion and professional sharing tools. Get your 14-day free trial, no strings attached.