Ableton Live is one of the most popular but complicated DAW (Digital Audio Workstations) to use. The learning curve can be quite hard but once you progress the possibilities are endless with Ableton software Live and its inbuilt free VST instruments and effects are of the highest quality.
Perfect for live performance, especially with a beat maker and or vocal, as it delivers via its session view as a great way of getting your ideas down quickly and then just jamming them out.
These ideas can then be transferred to the arrangement view for more advanced editing and turning your grooves into full-on finished productions.
So why choose Ableton Live?
Out of the box, Ableton Live music software comes with all the tools you need to produce audio production to industry professional standards and is also very compatible with external 3rd party software, hardware and midi controllers.
Used with either Akai’s Push or Novation Launchpad the possibilities become endless and your workflow is speeded up and made more fun at the same time.
There are 3 different versions of Ableton – Live, Lite, Standard and Suite. Live lite often comes free with midi controllers and also then offers a discount for upgrading so this is a great option to test it out.
Then you have the choice between standard and suite and the main difference is the number of instruments and fx.
Standard is more than enough to fulfil your needs whereas Suite has everything you will ever need plus Max for Live, which is now integrated inside the software.
Ableton Live – Max For Life
Max for Live has a community of people that make mainly free instruments, effects, utilities and anything else they can think of to be used right inside of the Ableton suite.
The 2 different views in Ableton Live each serve their purpose. The familiar arrangement view gives the music on a timeline so it is easy to follow and easy to edit. Session view is great for getting grooves together building up the sections and parts of a track.
Having everything looping gives a live feel to creating your music production and when used with a midi controller like the push or launchpad you have full control over everything.
Also, you can turn your phone or tablet either iOS or android into a fully functional controller for Live with 3rd party apps such as touchable or LK.
Akai & Novation
Akai’s Push and Novation’s Launchpad are the go-to midi controllers for Ableton. Both controllers have the session view grid laid out as 64 buttons as the main part of the controller.
Both controllers really offer the same basic functionality with Ableton Live straight out of the box and both can achieve the same thing with the main difference being the Push is more designed for Ableton whereas the Launchpad, although designed for Ableton, is a lot more programmable.
So if you like to experiment and mess around with audio to midi mapping yourself the Launchpad is for you but if you just want everything to work and not worry about the rest then Push is the controller recommended.
Ableton Live 10 comes with some major updates to push users to integrate the controller further and there are plenty of mid scripts for the launchpad available to do the same and more.
So, let’s get to how to use Ableton for advanced users.
The Best Improved Features For Workflow – Ableton Live 10
Edit Multiple Midi Clips Together
This new feature to Ableton Live 10 is one of the best things to come with this latest version of Live.
I like to separate my drums into different channels so I can produce them the way I like. Drum racks are good and really functional but I prefer the sound I get out of individual tracks for each drum part.
Separating the drum machine’s parts into different channels means I have to constantly open up the different midi effect parts for editing. Having the option of editing multiple midi clips at once is great, I can edit all the drum parts at the same time.
This speeds up the workflow and also just makes things easier. This is also great for instrument parts as you can see all the notes and timing together and make adjustments to the whole groove in one window.
Spotting wrong notes or out-of-time rhythms becomes effortless.
All you have to do is highlight all the midi parts you want to view (up to 8) and they all then appear in the same window.
Ableton Live – Automation
The new key command to view automation in Arrangement view has been added. To turn the automation view on or off in the arrangement view you just have to press the ‘a’ key.
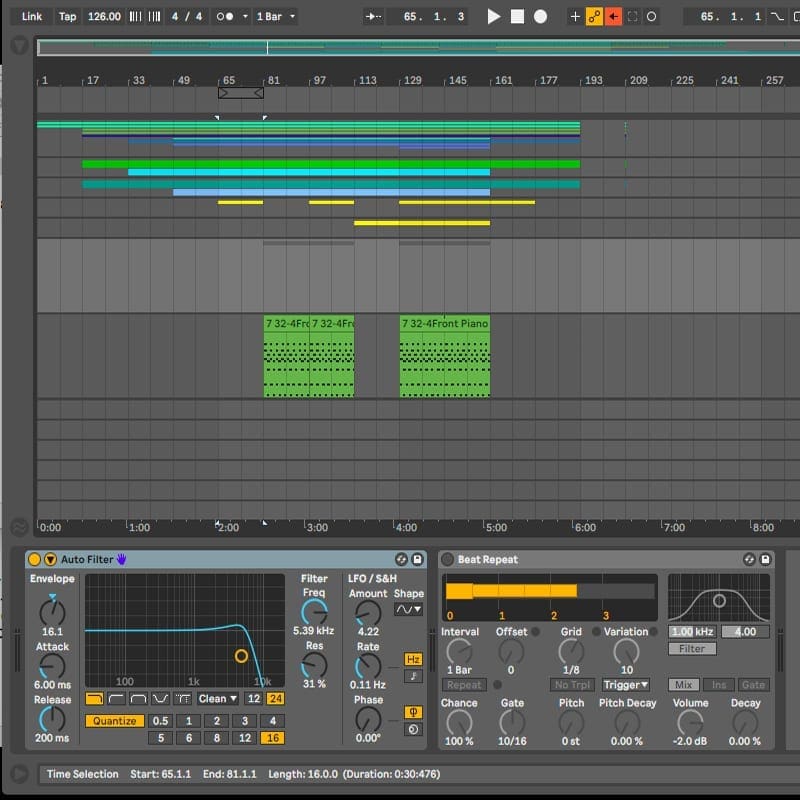
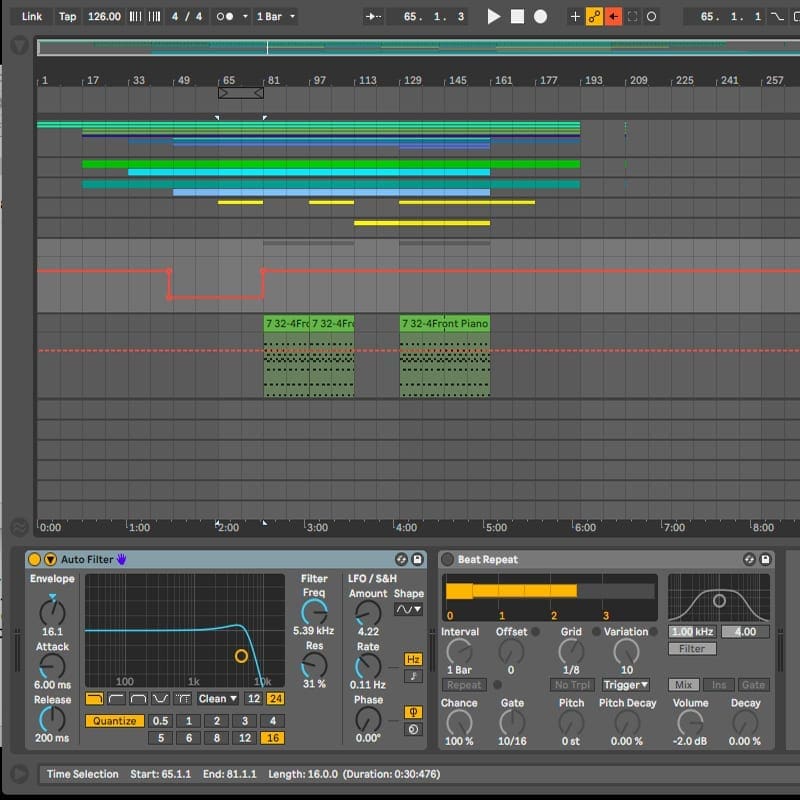
In the Clip View buttons to toggle between automation and modulation in the envelope, the editor has also been added which makes editing clip automation even easier than it was.
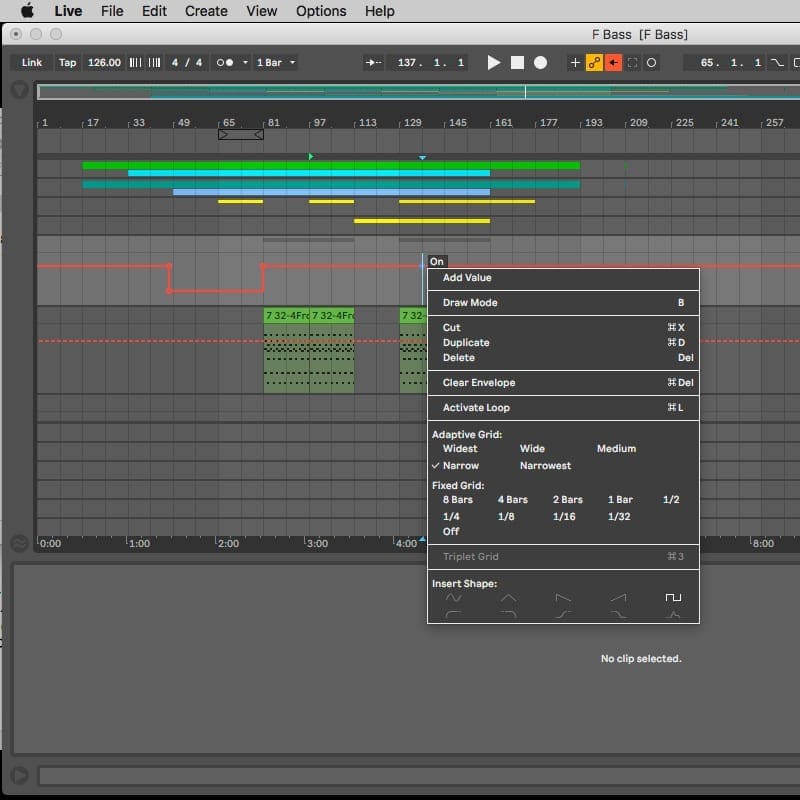
Automation Shapes
When editing automation and right-clicking on the desired automation part we now have a number of pre-defined shapes that can be inserted into your productions. Super smooth shapes that fit quantization and size of clip/track intuitively to help sculpt your tracks.
Pinch Zooming
Seems like an obvious one but up until Live 10, the only way of zooming in and out of different parts and sections was by pressing keys, shift and + to zoom in and just – to zoom out.
As of Ableton Live 10 standard zooming in and out with the trackpad has now been added. This saves so much time when moving from part to part and
Create Midi Clip in Arrangement View
Another feature that has only just been added is to create a Midi Clip quickly in Arrangement View directly by double-clicking on the desired midi channel. This saves so much time when working in the arrangement view.
Capture Midi
Ableton Live is recording what you do even if you are recording, which means no more missing the best take. It is often the way when you are trying to practice apart from that the first time you play it it is perfect but you had not pressed record.
Now you can just press the new capture midi button and live puts what you just played into a new clip or track.
Sidechain Freeze
When working with many tracks to save CPU it is often a good idea to freeze midi tracks. This converts the VST and effects into a static audio track which can be reverted back to its original state for more editing if needed.
Until Ableton Live 10, sidechain settings were not included when you freeze down a track – but now they are, which makes things a lot easier.
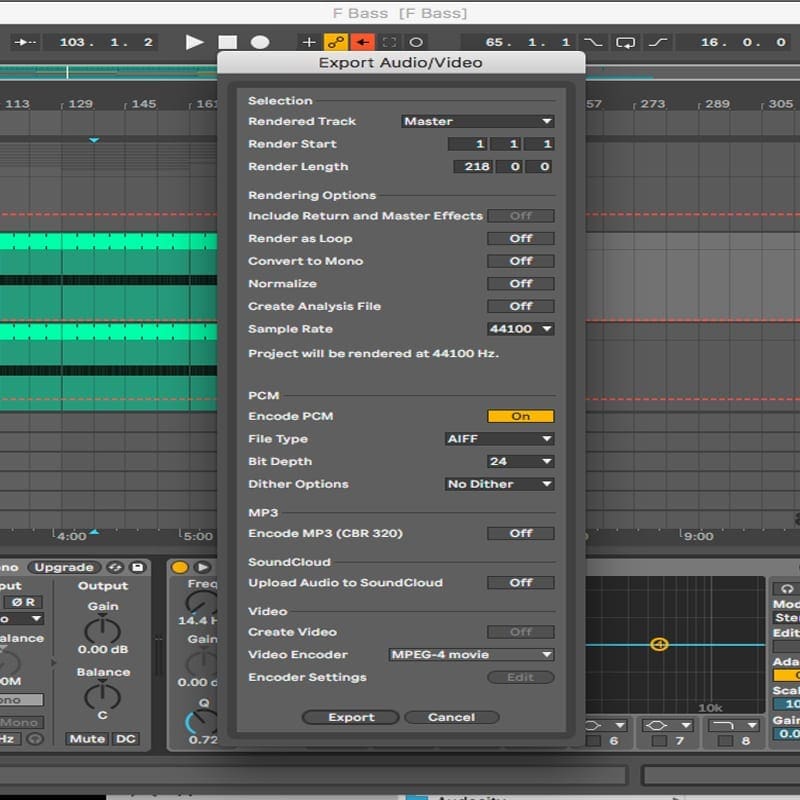
Disable Return and Master Tracks Effects When Exporting Audio
When exporting audio you can now handily choose whether or not to export the return and master channels effects in the bounce down. This is particularly useful to produce the stems for remixing parts without any effects.
Rather than having to disable each track, there is now a global command when you are exporting the track that takes care of the process for you.
Advanced Drum Production Techniques in Ableton Live
In Dance music and a lot of other styles, the drums are what keeps the song together. A strong and tight drum section is needed to make your productions stand up to professional recordings.
When producing the drums it is good practice to have a separate channel for each drum sound. This separates the parts and makes them easier to add effects and control the volumes. Each drum also needs to be EQ’ed and compression added.
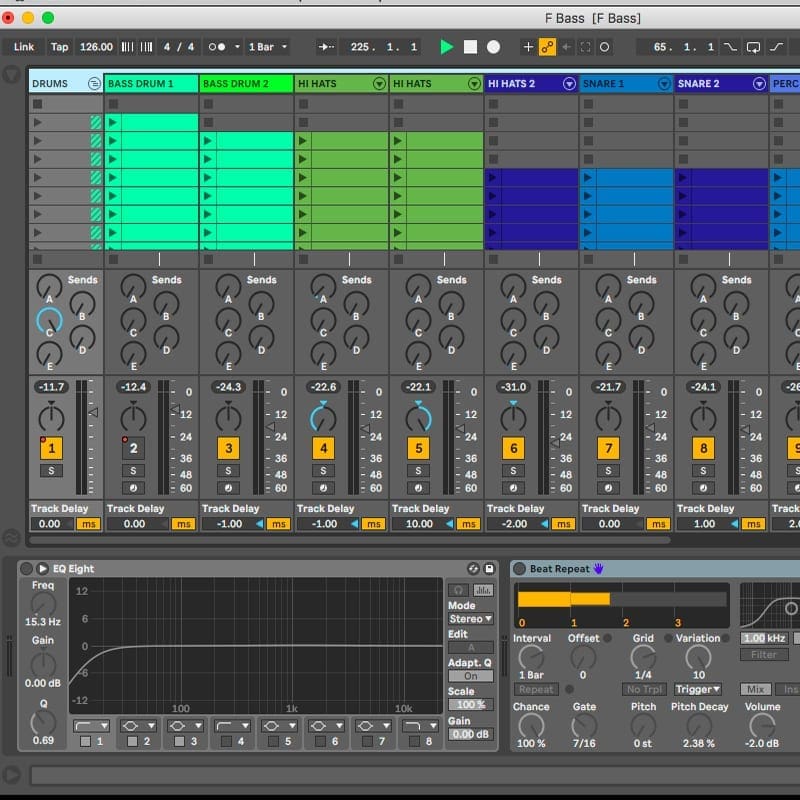
When using EQ it is better to take a subtractive approach rather than a boost. For example, if you wanted a bit more high-end on the hi-hats rather than boosting the high frequencies you would cut the low frequencies instead.
When applying EQ to individual drums generally all you need to do is cut the low end on everything apart from the bass drum.
This helps the bass drum kick through properly, as it has all the bottom end for itself. Even hi-hats produce low frequencies as you can see by activating the frequency analyzer on the eq.
The low-end cut is different for different drum parts and it is just a case of listening and experimenting with what sounds good.
The other essential for individual drum parts is compression. If used correctly the compression makes the drums sound more punchy and help smooth out any dynamics at the same time.
On individual drums a more gentle compression can work well, using a low ratio of 1.5 – 3, with a small attack and fairly quick release, tends to work well but there are no rules so just experiment until you find the perfect sound.
Processing
After you have processed each drum hit the next thing to do is to group all the drum tracks together so they can all be processed again as a full kit.
This helps glue all the drums together and when put through a multi-band compressor or the new Drum Buss audio effect the drums all of a sudden sound twice as powerful as before.
A few other Ableton Live tips to help with drums are the use of mono tracks, stereo panning high hats and the humanizer max for live effect.
Bass drums and snare drums should really be in mono. This keeps them dead centre in the stereo image where they need to be. You can do this by adding the utility mono audio effect on the channels with the bass and snare drums.
So with the bass drum and snares centred, you can give your drums width by panning some of the other parts.
A good trick is to double up the hi-hat part and pan the two tracks hard left and right then slightly detuning and changing the midi delay of one of the hi-hat parts really widens the mix. You can then pan other drum parts to taste.
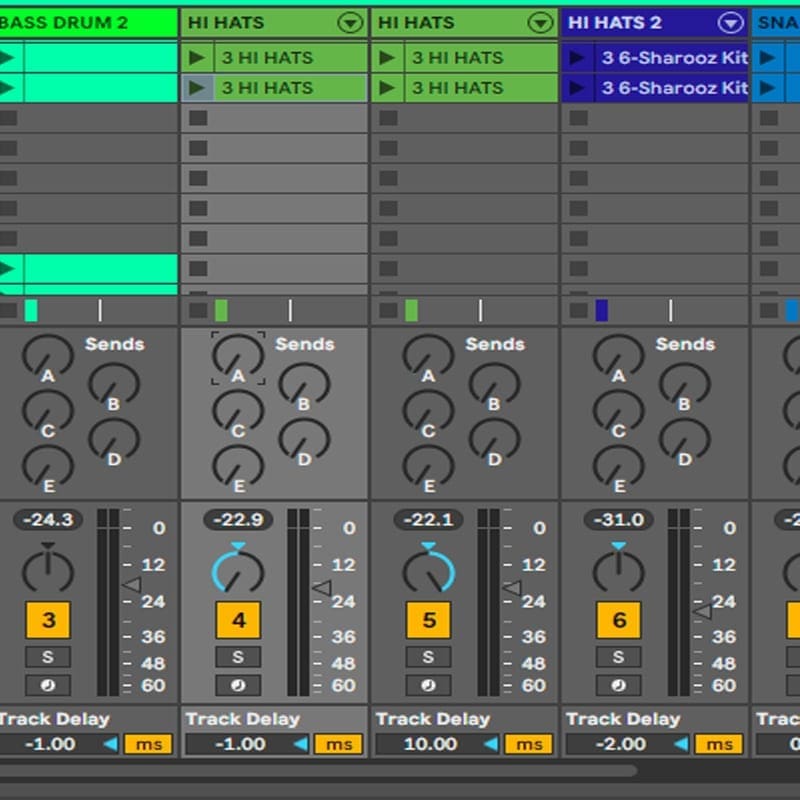
Max for Live is integrated directly into Ableton Live 10 Suite and a humanizer effect is available free from the Max For Live website.
The humanizer basically makes the timing of the drum vary slightly each time it plays, you can set the intensity and when set correctly the drums just sound more natural and human.
Sidechain
Sidechain is one of the best things you can start doing to your productions if you are not doing it already. This simple technique can be used in so many different creative ways but to get you started I will give you a couple of essential tips.
Sidechain the bass with the bass drum. This technique makes the bass drum and bass part sit together perfectly. What this does is every time the bass drum sounds it reduces the volume of the bass line either subtly or more extremely and makes the bass drum punch through in the mix.
It is the pumping effect that makes the bassline almost seem like it is bouncing and really gels together with the 2 parts.
Now start applying this to the other parts as well and the whole track starts to get a more glued-together sound. Sidechain works particularly well on pad sounds with long sustained chords.
Low Attack
Setting low attack and threshold settings and using the release in real-time to set the intensity.
Sidechain is a relatively easy process to do these days and inside the compressor of choice you switch the side chain on and select the source signal, you can use anything you want or even create a separate sidechain channel, muting the output and using that as the sidechain source signal.
Often referred to as a ghost channel it can be better to use than say a kick drum as the kick drum might drop out of the mix which would stop the sidechain when you might still want the effect going.
Live’s auto-filter also has a sidechain switch which takes the auto-filter to the next level.
Auxiliary Send and Returns for Reverb, Delays and Parallel Compression.
Using the auxiliary send for reverbs and delays instead of on the individual instrument or audio channel will help give your productions increased stereo width and a more coherent sound.
The advantage of using the auxiliary sends means you can send multiple signals to the same effects so they all share the same reverb or delay.
This gives the mix a coherent and more realistic sound and is how you would do it in a recording studio. Of course, you can set up a couple of different reverb and delay sends if you need different extremes for different parts of the track.
Reverb
When using Reverb it is good to send the rhythm parts and vocals. For the drums, you can send some of the drum kit snares, hi-hats and percussion but not too much.
Obviously, listen to see what sounds best but there is usually a sweet spot where you can just about hear the effect in the background of the music.
The bass frequencies tend to make the mix sound a bit muddy through reverb so it is good practice to cut the bottom end of the reverb with eq and then compress the send channel to glue the sound together.
The bass end does not work that well with reverb it can be used effectively on bass drums and bass lines.
Delay
Delay is also a great tool for adding depth and width to your mixes. You can use it with or instead of reverb but it works particularly well on the synths, guitars, keys and vocal parts.
Using a stereo ping pong simple delay low in the mix on these parts really creates a sense of space and depth in your mix. Again on the return channel make sure to cut the bottom end with EQ and compress the output and place it in the mix at a level you can just about hear.
Parallel compression again makes use of the auxiliary send and returns and can really fatten up a mix. In your mix down you will ideally group all your parts into different sections, say sessions drums, bass, synths, fx and vocals.
These different groups can then be sent to separate auxiliary channels and processed with extreme compression. This single device mixed very low in the mix doubles up the sound and gives real depth and width to a mix.
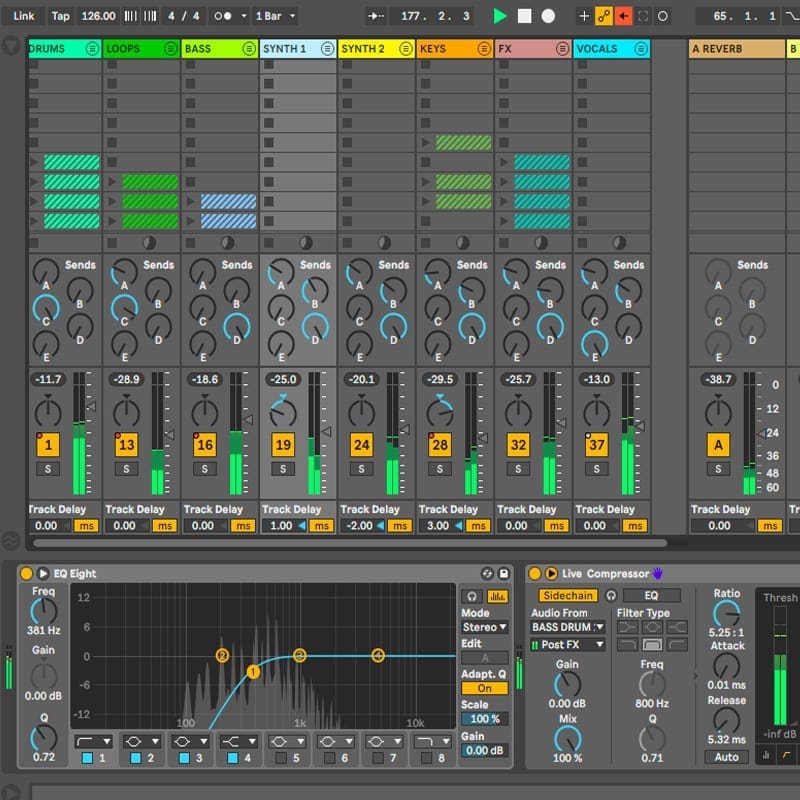
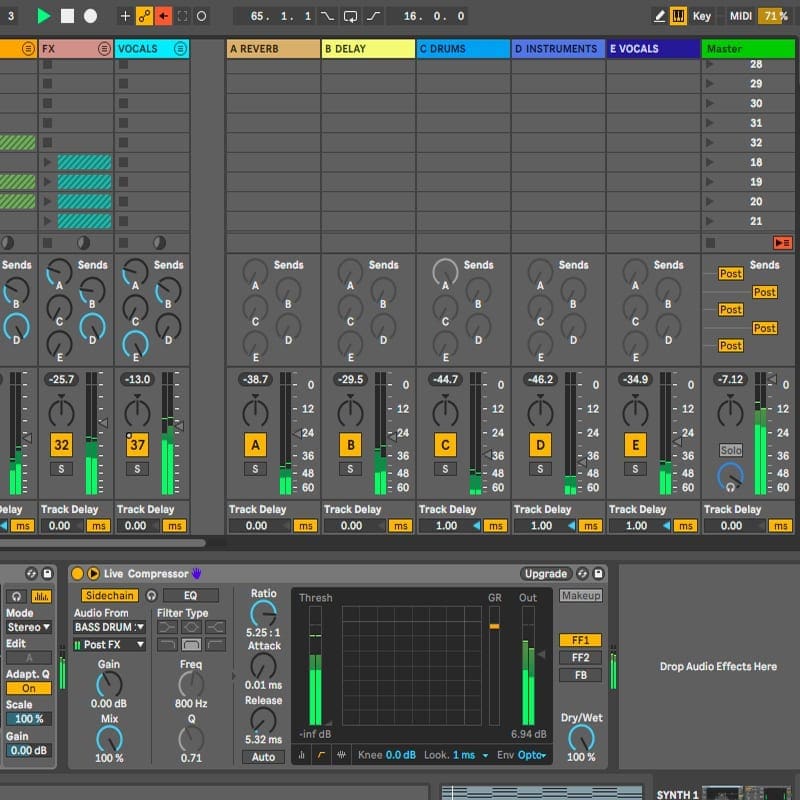
Send and returns are easy to use if you need to create a new one just right-click over the return channels area and you will have the option to create a new return channel, the send knob will appear on every channel automatically.
Then just adjust the send level for the part you wish to send to the return track which has your chosen effects on it.
Ableton Live 10 is packed full of new effects, instruments and workflow improvements. The updated screen resolution makes everything a lot clearer on the screen making longer sessions easier on the eyes.
For playing live or recording and producing your own compositions, it is thoroughly recommended as you have everything you could possibly need plus more straight out of the box. Also, check out our article on Ableton Templates to help you!


